
Hey there! ☆ I’ve always been a fan of the dynamic doll poses, they look so lively!
If you want to know how I took this photo, keep reading ~ 🎵
Get a good equipment
I’ve tried to recreate jumps, steps or difficult poses with different tools but now… now I have the definitive one!
It’s the flexible Acbjd stand you can see here below and on my Instagram video. I bought two: one for indoor use (to keep it new and clean), and another one for outdoor photography.
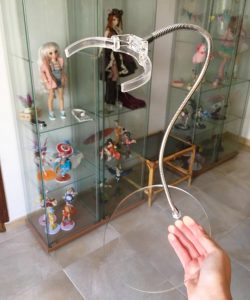
They’re very sturdy and hold the weight of a Dollfie Dream perfectly. As you can see, it’s formed by a transparent base, a flexible “stick” and a clamp (in the video I hid it by putting Coco’s hair above).
This is the basic tool to get a dynamic pose for your doll. But we can go much further if we use more pieces to pose hair and clothes in the air. Photographers like Zodake or @Cute_Lilia dominate this art!
Pose your doll and shoot
You know I always advise to spend all the time you need to pose the doll. To learn more about this topic, read point 3 of my ‘10 tips for Doll Photography‘.
If it’s possible, hide the stand as much as you can, that will save you editing time.
Now choose the best angle and shoot. For dynamic doll poses try with low angles like those in this photo shoot, trust me 😉
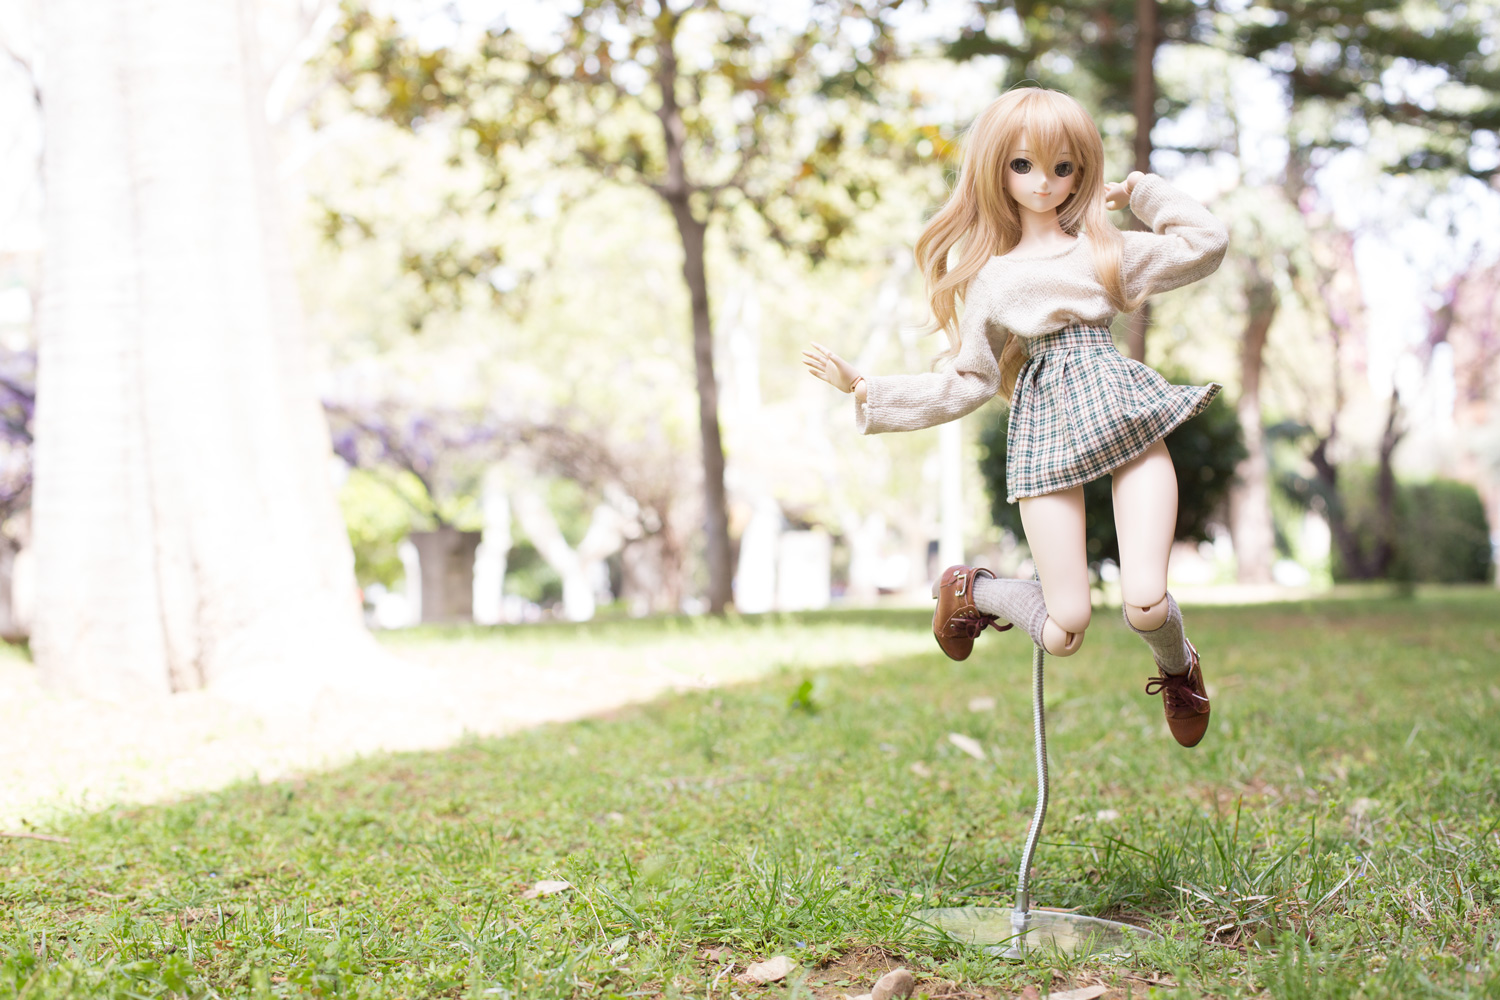
Original picture without editing
Editing
Time to do some magic! ~ ☆ These are the 3 main tools I use in Photoshop to erase stands and similar objects, with example videos of how they work:
Spot Healing Brush Tool

It’s a simple tool with which the program “deletes” the area you paint simulating a possible background. It works great for hairs, acne and in this case, our stand.
It’s important that the brush size is as similar as possible to the object that you are going to erase, in order to avoid weird things XD
Patch Tool

I use the patch to start with wider areas, such as the base of the stand. Draw an area and drag that selection to the texture you want. In my case, I choose the piece of grass that I like the most. The program does ‘copy and paste’ adapting the lights, shadows and edges.
Clone Stamp Tool

The Clone Stamp Tool does a selective ‘copy and paste’: set a point and clone it where you want. I like to clone in a new layer so this way I don’t lose the information of the original photo (sock and knee in this photo). Doing this allows me to polish delicate areas.
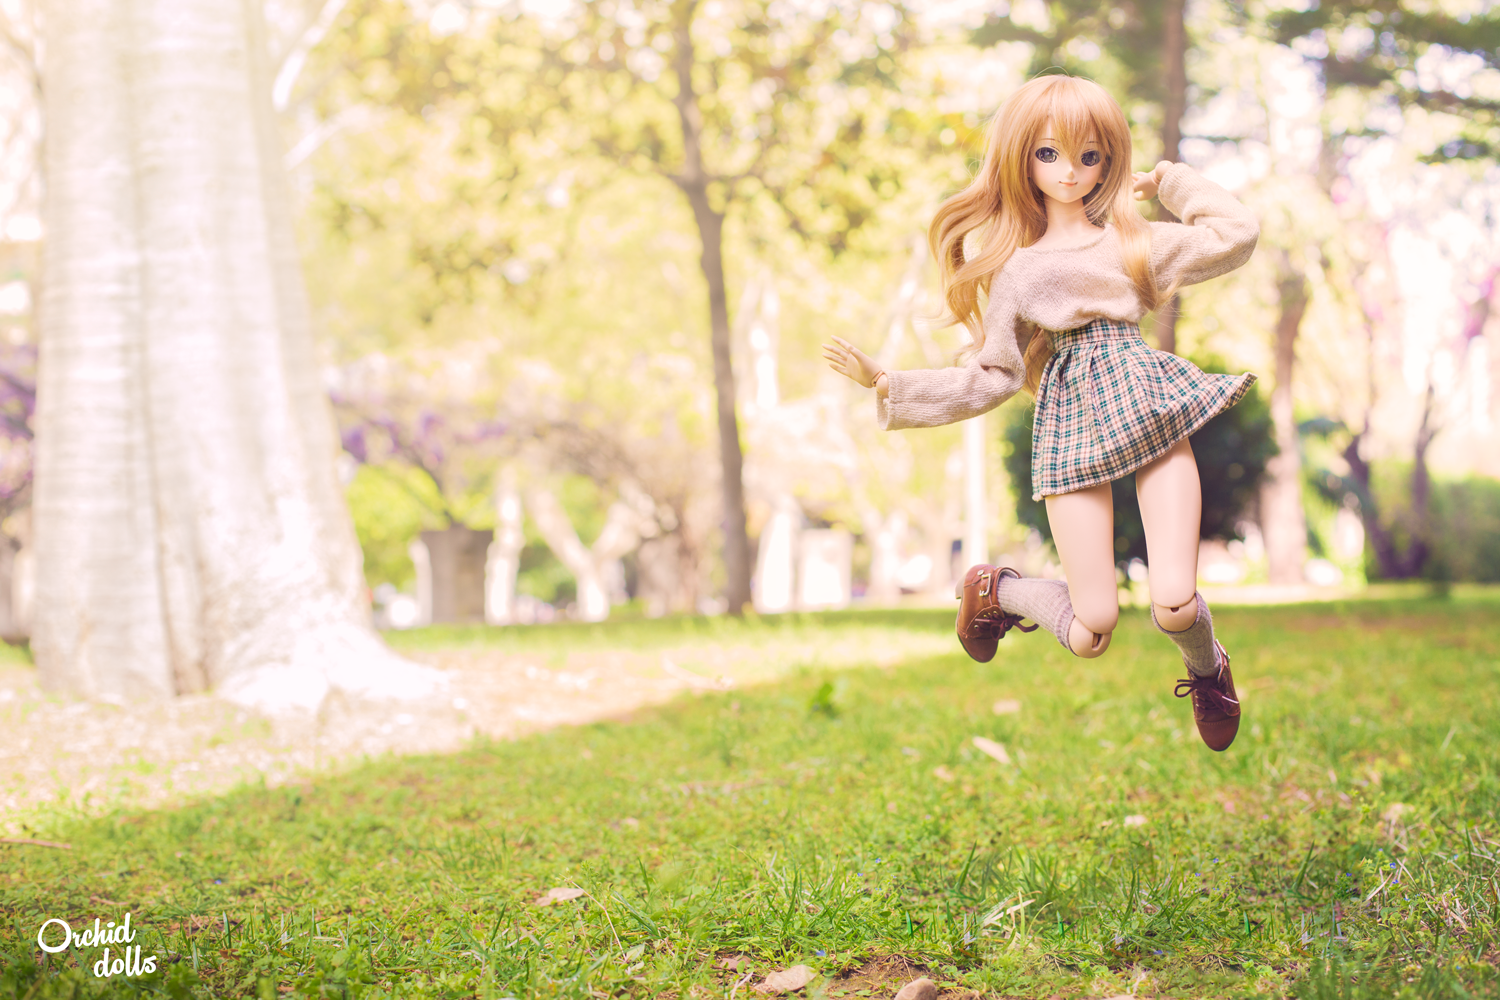
Final Result
Before
After
And that’s all, trick revealed! 😛
Once the stand is removed, you only have to edit the photo as any other. Of course, I advise not to over use the tools I’ve commented, because it’s very easy to make it look fake.
I hope it’s been interesting and, as always, if you have any questions or proposals leave a comment below ^_^
Oh! And if you take a picture using this tutorial, please let me know in my social networks or here, I will love to see your work! 😍


Goblin | May 7, 2018
|
Me compré este stand transparente a raíz de tu foto, ya lo sabes, estoy esperando a que llegue para poner este truco en práctica! Muchas gracias por los tutoriales, ayudan mucho a quienes somos novatos en esto ^^
orchiddolls | Author | May 9, 2018
|
Jaja me alegro de que te lo hayas pillado también! (debería ir a comisión XDD). De nada, estoy encantada de que te sea útil!! ♡
Panda | May 7, 2018
|
This was a really great tutorial! I have seen other methods where people take a picture with and without the subject and just erase the stand out. But, that requires a tripod. Have you tried that method as well??
orchiddolls | Author | May 9, 2018
|
Thank you for your comment! ♡
Aye! I know that method, it’s even easier to do it that way if you have a tripod, as you have the real background. But I don’t usually use tripod because I don’t feel free with it, I need to move the camera to get the best angle in a doll photo shoot ^_^
wieselhead | May 8, 2018
|
I always liked such pictures with a lively free standing pose without visible support, I always wanted to do something similar, but decided that it’s too much work and risky for the doll XD. Nevertheless your kind tutorial is quite encouraging to actually try it again (⌒▽⌒)
These third party doll stands are great with thin metal rods that offer a reliable way to make your doll stand properly.
Lets see if I can come around with something decent
Your picture looks really beautiful! (°◡°♡).
Well of course since it’s Coco ^^
Did you also do a trick with the flowing hair?
orchiddolls | Author | May 9, 2018
|
I also felt like you at first! XD The fear of watching your doll fall is always there, but with this new stand it’s a loooot easier, and now I feel comfortable using it.
Thank you my friend! I’m happy that you like my pictures ^_^
For the hair I just combed it like that (this wig is quite voluminous and malleable). Then, in Photoshop, I used the “Liquify Filter” to exaggerate its volume even more. If you look at the “before and after” pictures you’ll see it 😛
Pingback:Coco in the park | Practicing outdoors 'Doll Photography' - Orchid Dolls | July 7, 2018
|
Flamme'de Sol | August 17, 2018
|
Greetings!
First of all, please forgive my bad English =)
After, really thank you for your photos, guides and tips! Your guides really help me to improve my own doll photos (or I hope so =) )
May I ask, stand in this guide situable for usual exposition, or can be used only for photo purposes?
Currently, i’m looking for 1-2 new stands, cause collection is growing. So I want stands, situable for both purposes.
Thank you!
orchiddolls | Author | August 18, 2018
|
Thank you!
No problem, my English is not perfect anyway! >u< I'm so happy that you found it helpful! About your question, this is a very sturdy stand so it can be used indoors and for exposition purposes, if you like it's style. I mean, there are more 'discreet' stands for exposition, like Coolcat's, which is the one I use in one of my dolls (the rest of it stand on their own). It has a very small base and a straight stick and that's all, take a look at my "Collection Room" post to see it ^_^ And the stand I talk about in this post, from Acbjd, is way more visible. It's a matter of taste, but yeah, both can be used for exposition purposes 🙂 Hope that helps!
Blowfish | November 10, 2018
|
Hey!
Ive recently bought the same stand as you since it looked like exactly what I wanted.
I am really happy with it but I really wonder what the second bolt nut and the rubbery tack on spot from 3M are for? Ive used one of the bolt nuts to attach the Arm to the Stand but I am really out of clues what to do with the rest xD
I hope that you can elighten me what those are for.
orchiddolls | Author | November 10, 2018
|
Hi!
I don’t remember it well, but I think I also got some pieces left that I didn’t use lol
The most important thing is that it holds your doll strongly, if it does, then don’t worry :3
Pingback:Merry Christmas 2018! - Orchid Dolls | January 22, 2019
|